Google Cloud Natural Language API reveals the structure and meaning of text by offering powerful machine learning models. This article describes the steps, how you can enable the Google Natural Language Cloud API.
Why need me the Language Analyzation functionality?
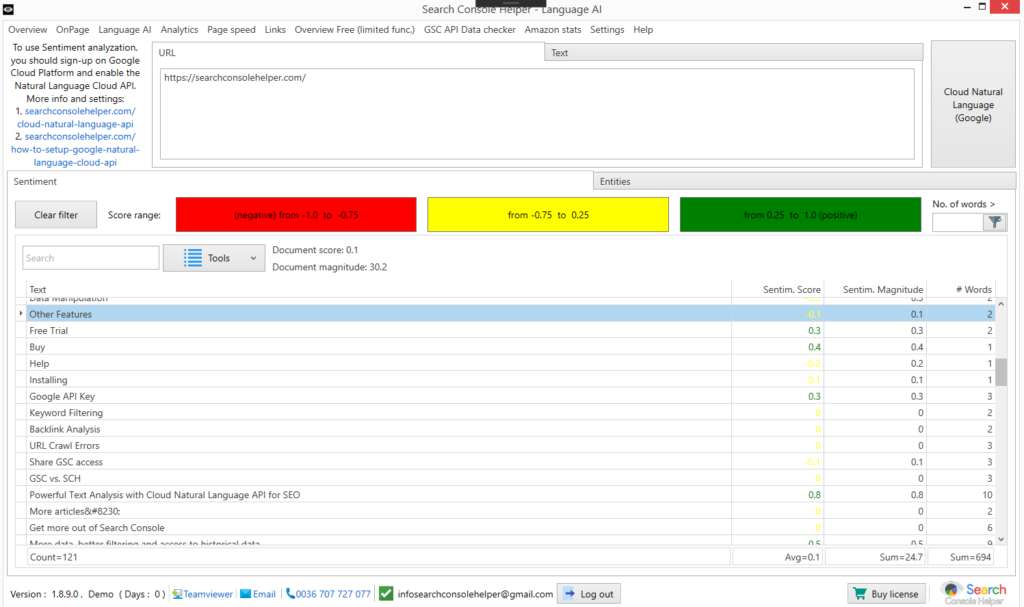
Forget to count the number of words of your website. It its better to write “meaningful” text. Meaningful text has a high sentiment magnitude.
To get the sentiment magnitude you can use the “Analyze language” function of our SEO tool Search Console Helper.
But this API is not for free. Depend on your usage, you should pay a very little fee.
To use this API, you need finally a JSON authentication file. Now i described, how you can get it:
How can I get my own JSON authentication file?
Step 1: If you don’t already have a Google account, sign up.
Step 2: Visit console.developers.google.com and sign in with your Google account.
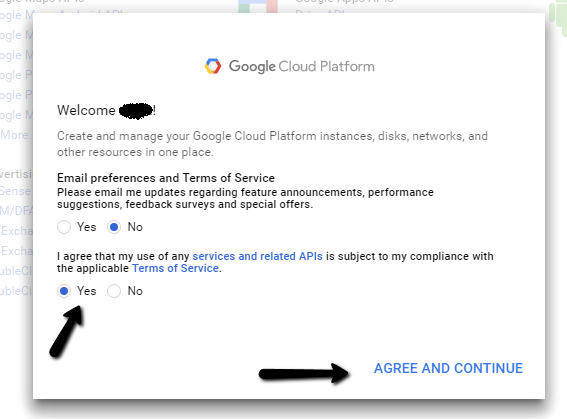
Step 3: After signing in, you will be asked to agree to the terms and conditions. Select Yes, and click on Agree and Continue.
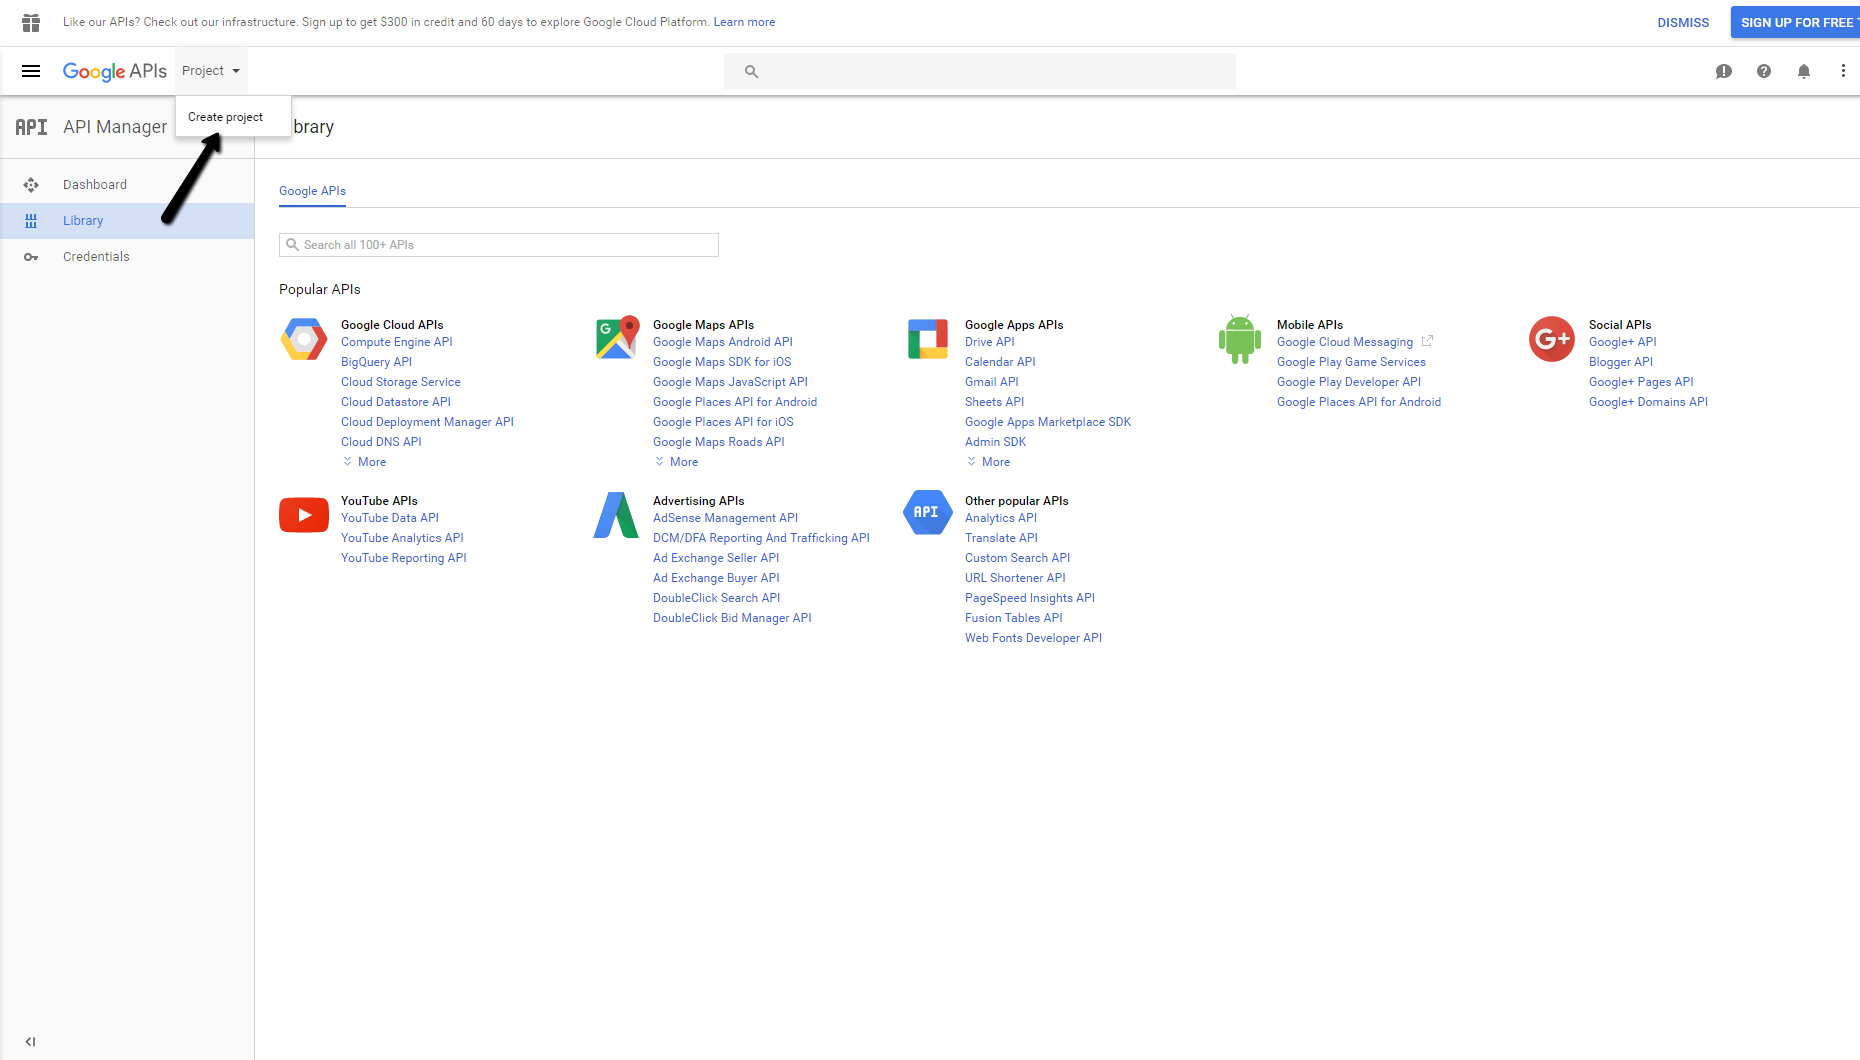
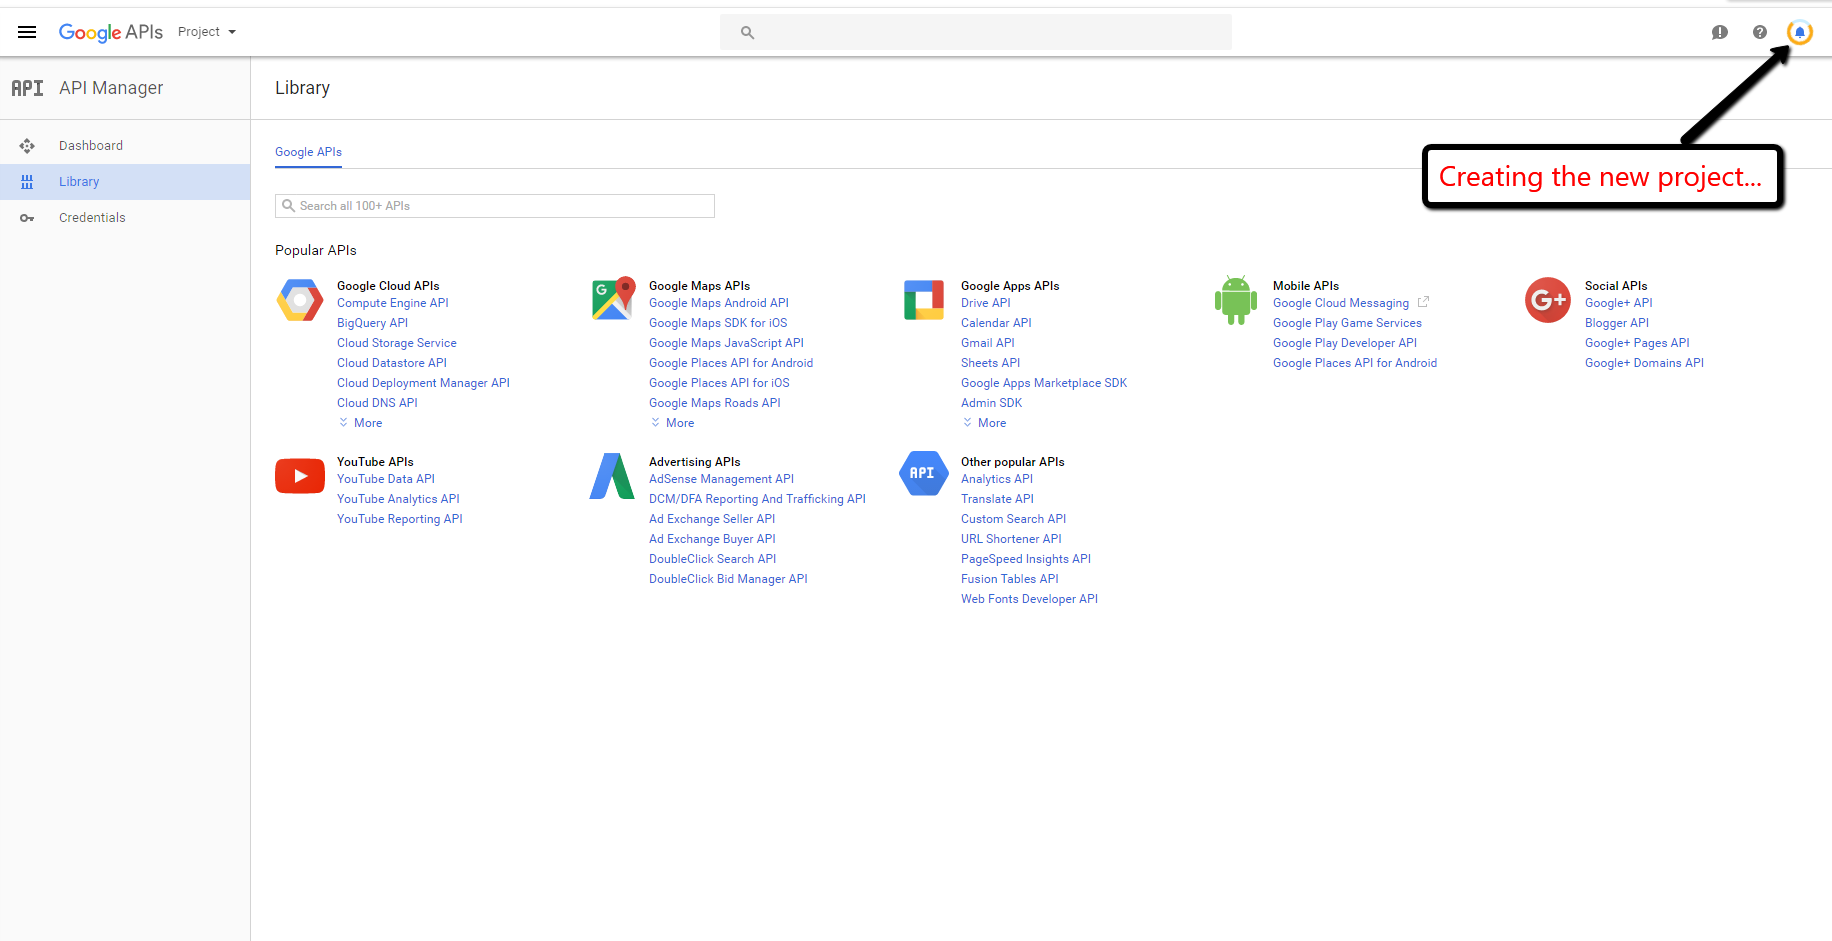
Step 4: Create a new project by clicking on Create Project. If you have a project already, that’s fine too. Select that. And jump to Step 7.
Step 5: Enter a project name and click Create.
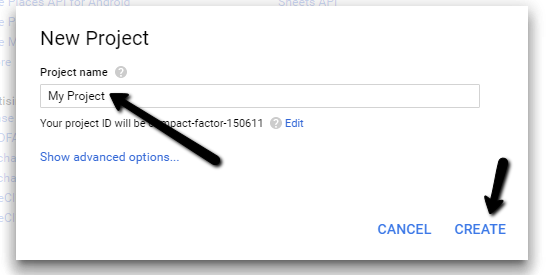
Step 6: Wait while your project is being created.
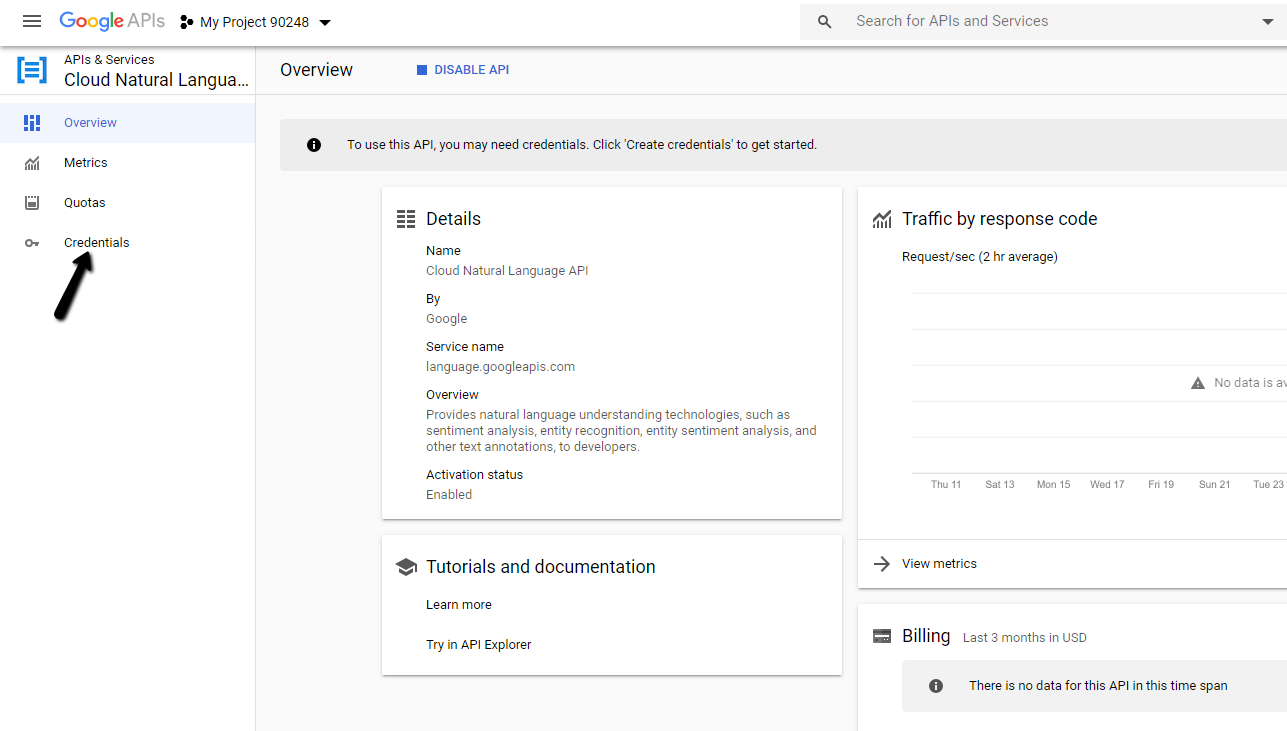
Step 7: Once created, type “cloud natural” into the search field and click on Cloud Natural Language API.

Step 8: Click Enable to enable the API.

Step 9: You have to setup your Billing Data, so click on Enable Billing. If you are not an administrator of billing accounts, you need one. After click on Create Billing Account enter your basic info and bank account info, create an account (this images not attached). After it’s ready, you can Enable the API on same page what you see on the first image.


Step 10: Click Credentials on the left menu.
Step 11: Click on Create Credentials on the top, and select Service Account.
Step 12: Fill some data to the form and Click Create, and Next, Next. Then your Service Account was created.

Step 13: Go into the Service Account, and Click Add Key button->Create new Key-> JSON. Your JSON file was created and downloaded in the same step.


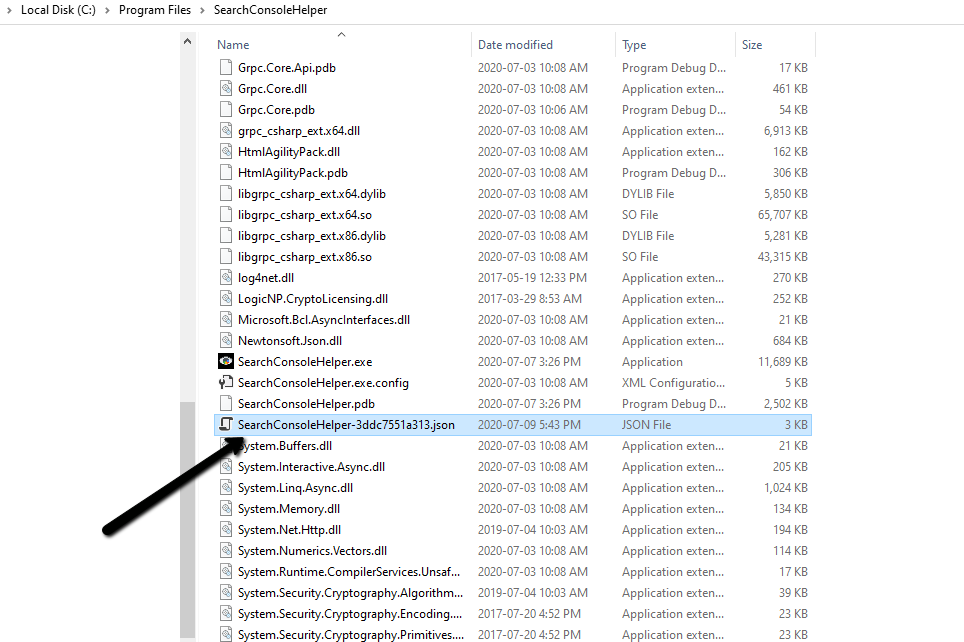
Step 14: The last step is to copy-paste your downloaded JSON file to the Search Console Helper (C:\Program Files\SearchConsoleHelper\) folder and rename the file to : SearchConsoleHelper-3ddc7551a313.json. BE CAREFUL with the file name/extension (not json.json).
You have successfully created and set up your own JSON Authentication file! Now you can use the Language AI page in the Search Console Helper. Congratulations!
If you have problem(s) during the process, feel free to contact us for support.
Resources
For more information about Google API, feel free to consult the following resources: