There are many benefits of using your own Google API key with Search Console Helper. You would be ill-advised not to take advantage of it. This article describes, the exact steps you need to take in order to setup and use your own Google API key.
What is an API key and why do I need one?
In order to use the Google Services (and every other services) from an application/software, you have to identify yourself.
In technically more accurate terms:
An API key is a unique value that is assigned to a user of this service when he’s accepted as a user of the service.
When you download Search Console Helper, it comes with a pre-installed (our own) API key. On one hand, this is good because it allows you to use the application, immediately, without the need for any additional setup.
On the other hand, you might experience quota limits when fetching data from Google, as this API key might be used simultaneously by several Search Console Helper users.
The more users use the same API key simultaneously, the more likely you are to hit quota limit errors (you will see this message in the application log file: AppData folder\log.log file):

By using your own API key, you will have the quotas just to yourself and you are unlikely to experience quota limit errors.
How can I get my own API key?
Step 1: If you don’t already have a Google account, sign up.
Step 2: Visit console.developers.google.com and sign in with your Google account.
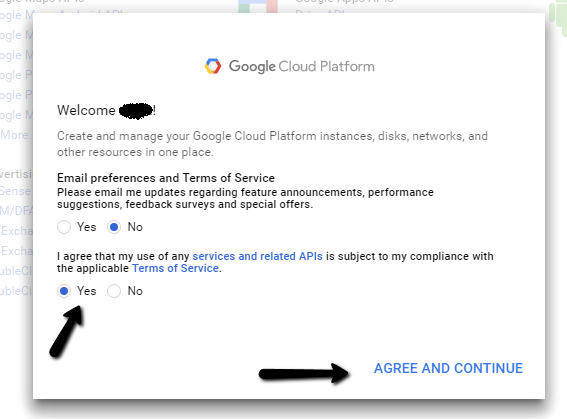
Step 3: After signing in, you will be asked to agree to the terms and conditions. Select Yes, and click on Agree and Continue.
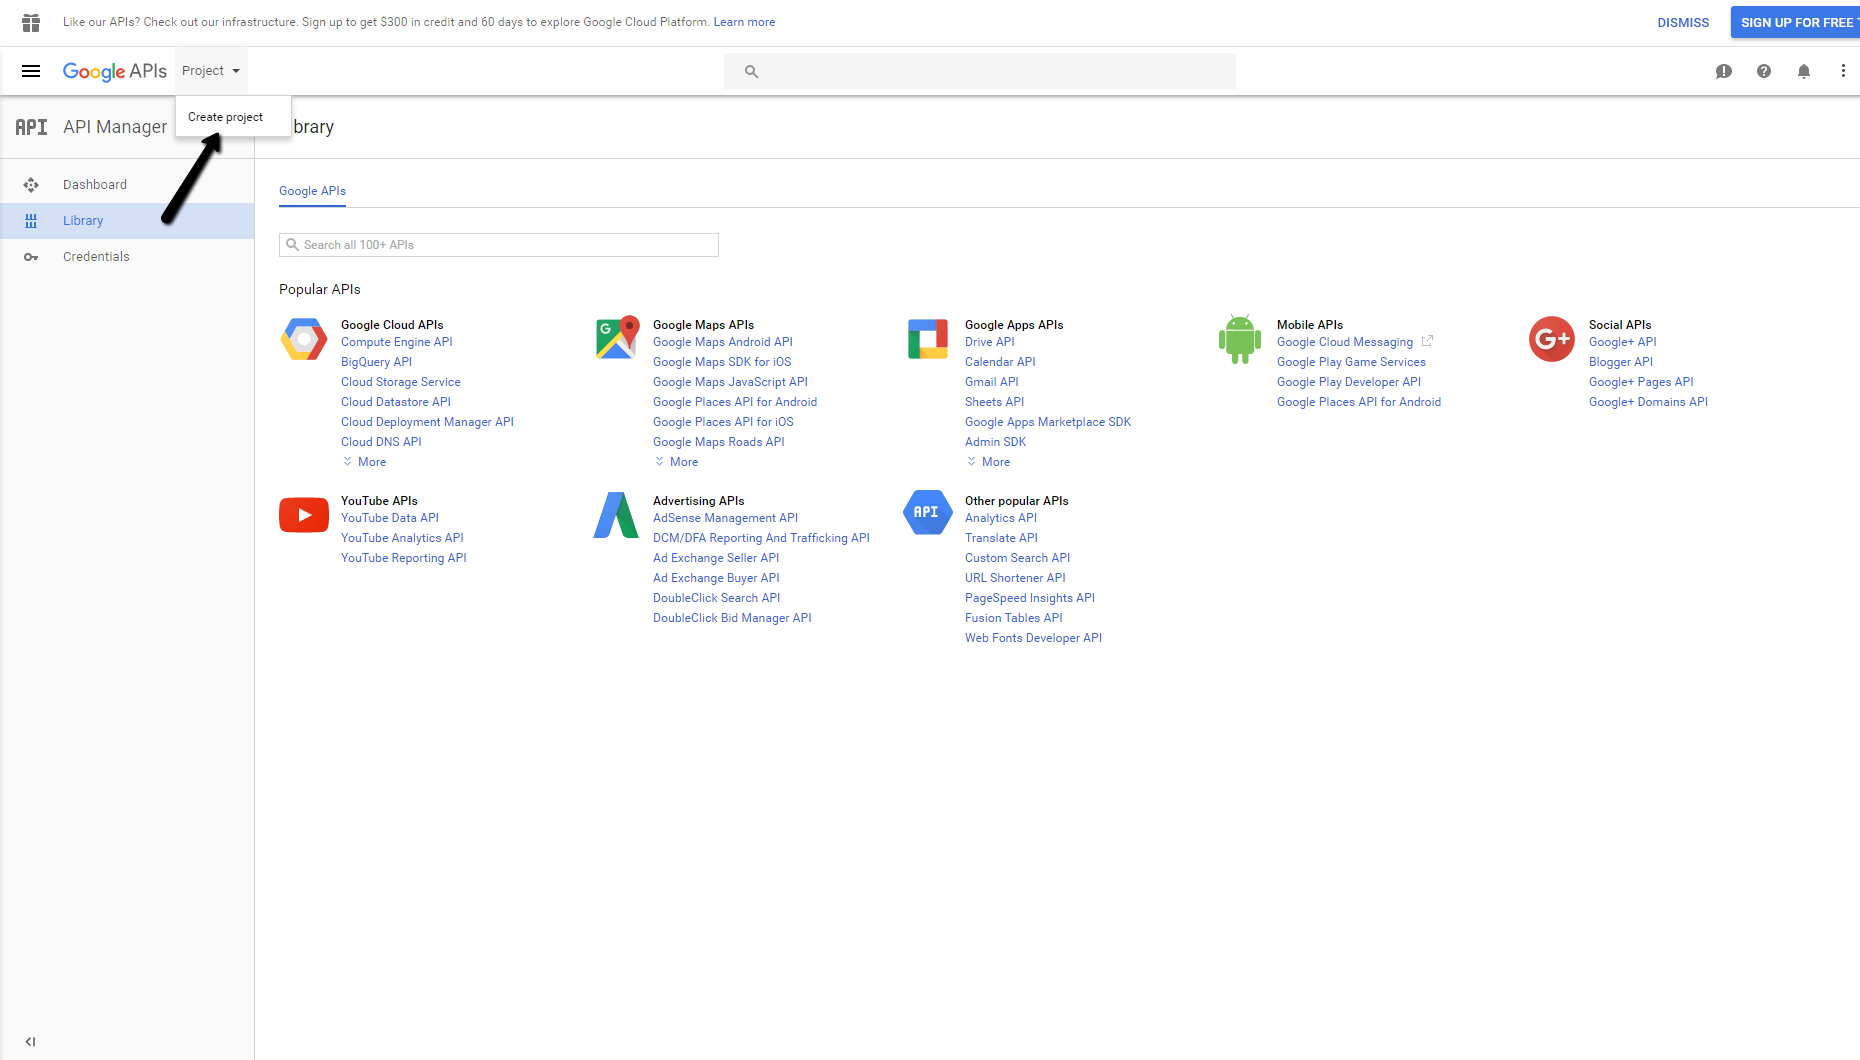
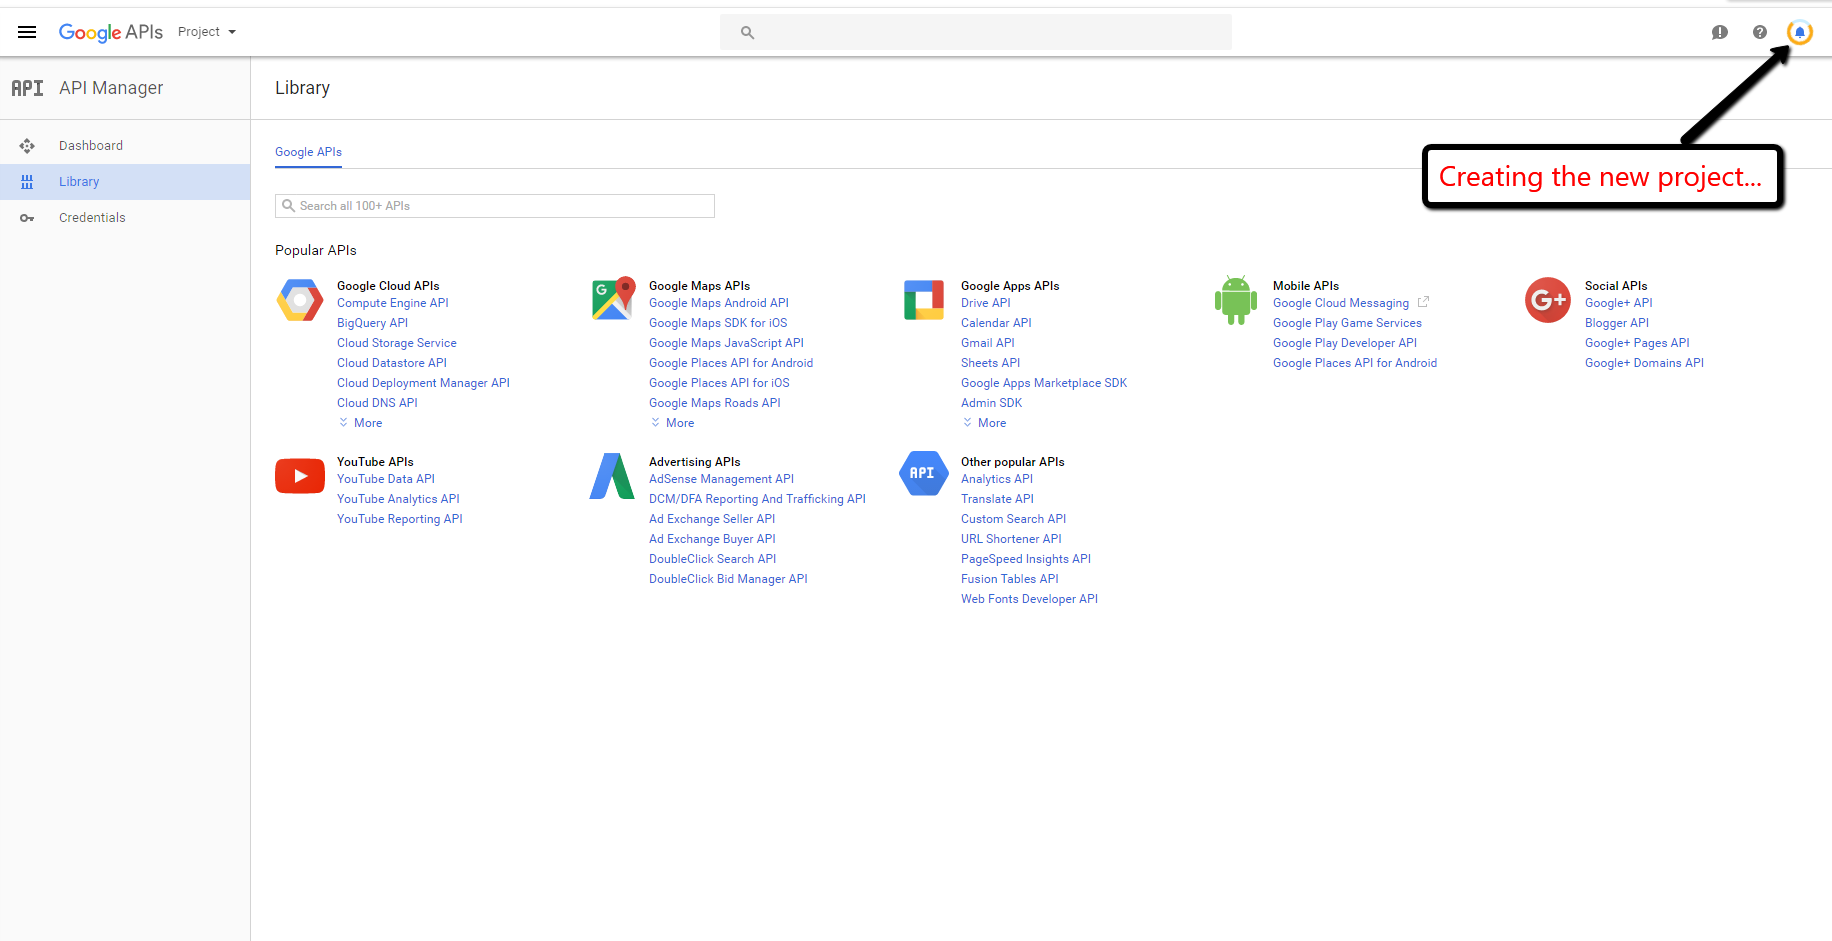
Step 4: Create a new project by clicking on Create Project.
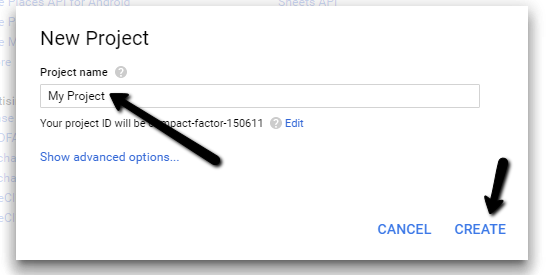
Step 5: Enter a project name and click Create.
Step 6: Wait while your project is being created.
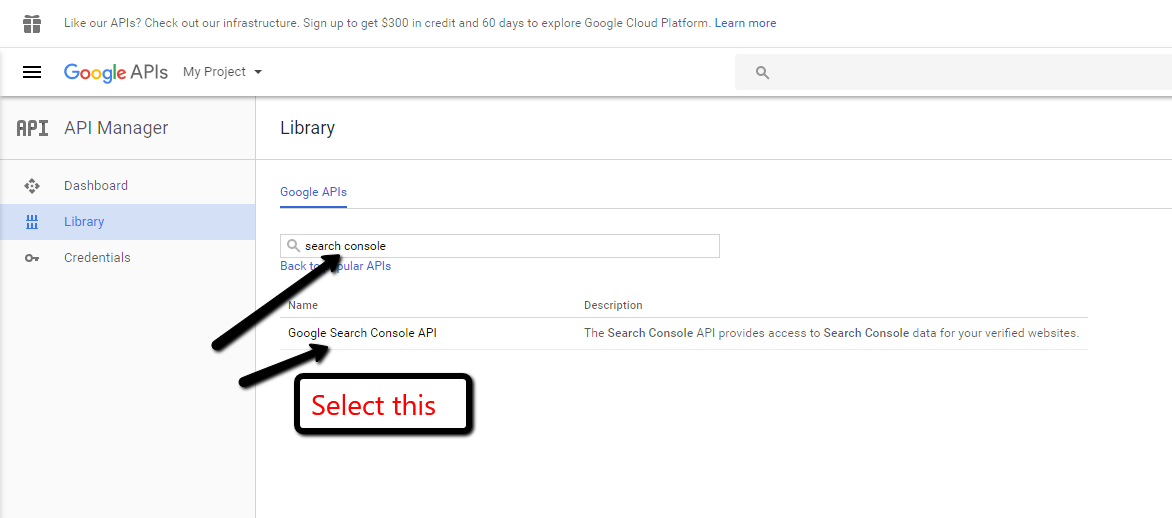
Step 7: Once created, type “search console” into the search field and click on Google Search Console API.
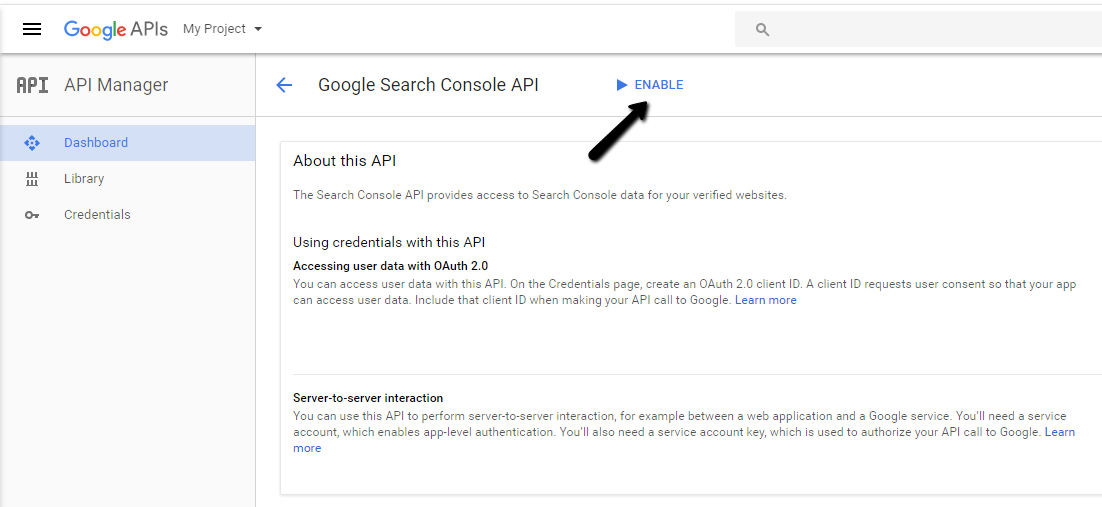
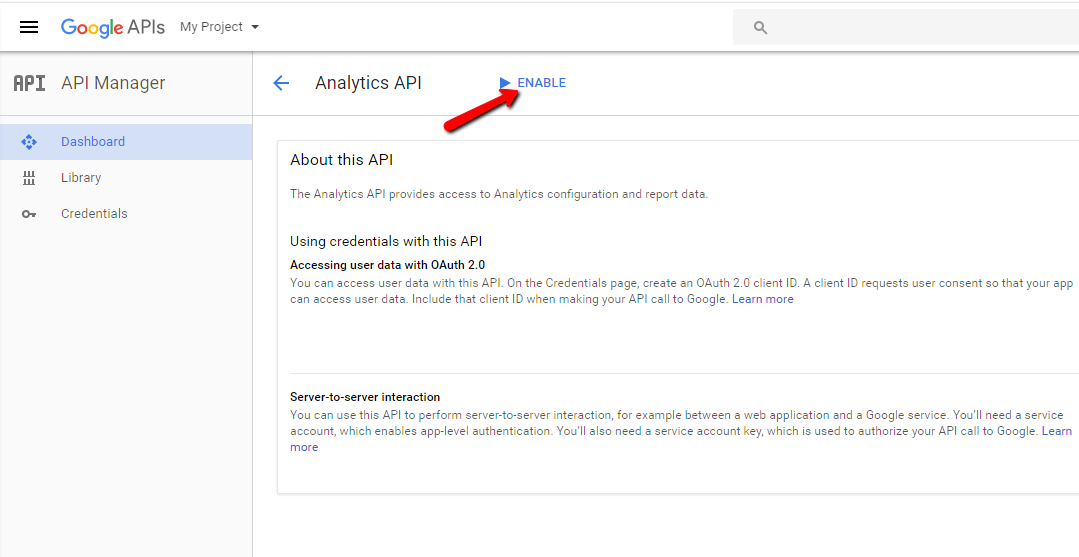
Step 8: Click Enable to enable the API.
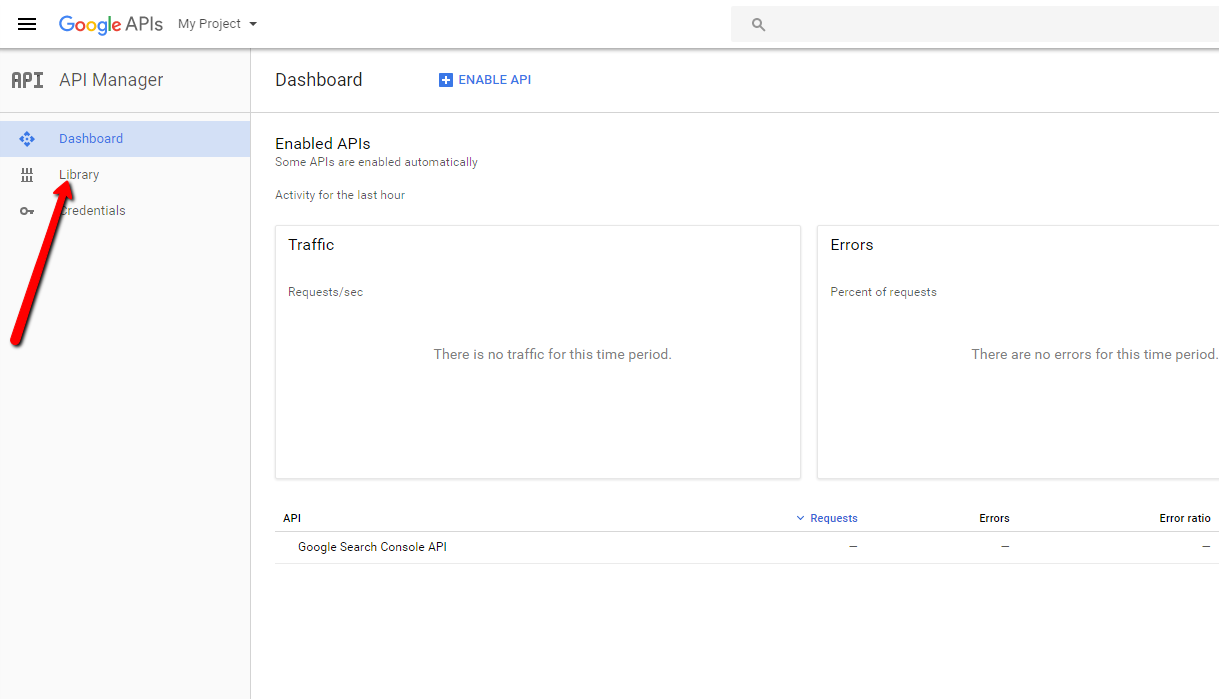
Step 9: Click Library on the left menu.
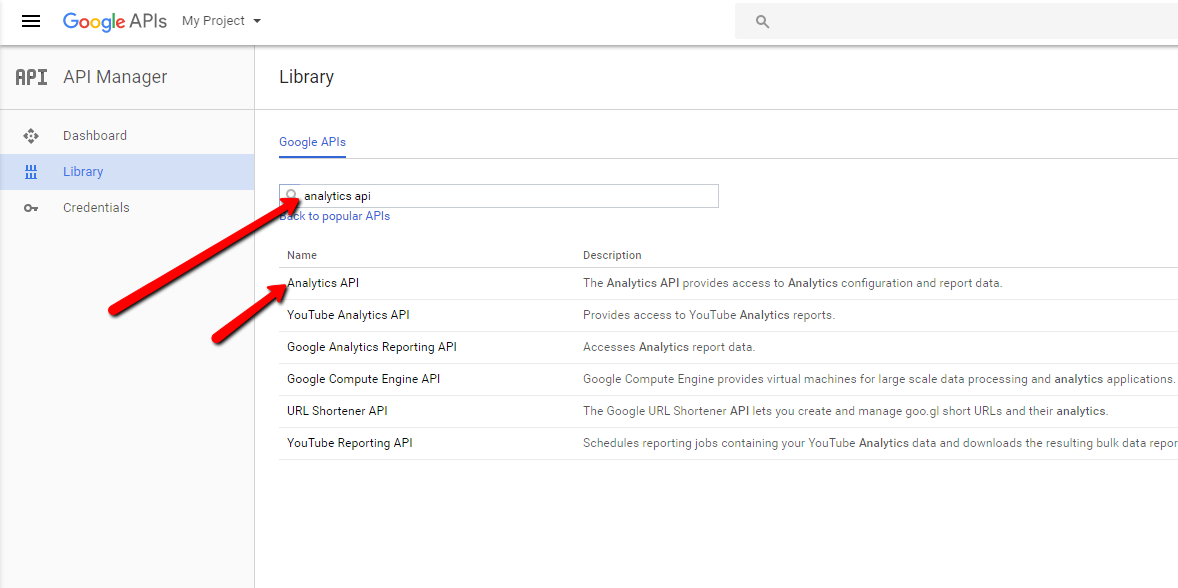
Step 10: Search for Analyitcs API, and select/click Analytics API in the list.
Step 11: Click on Enable to enable Analytics API.
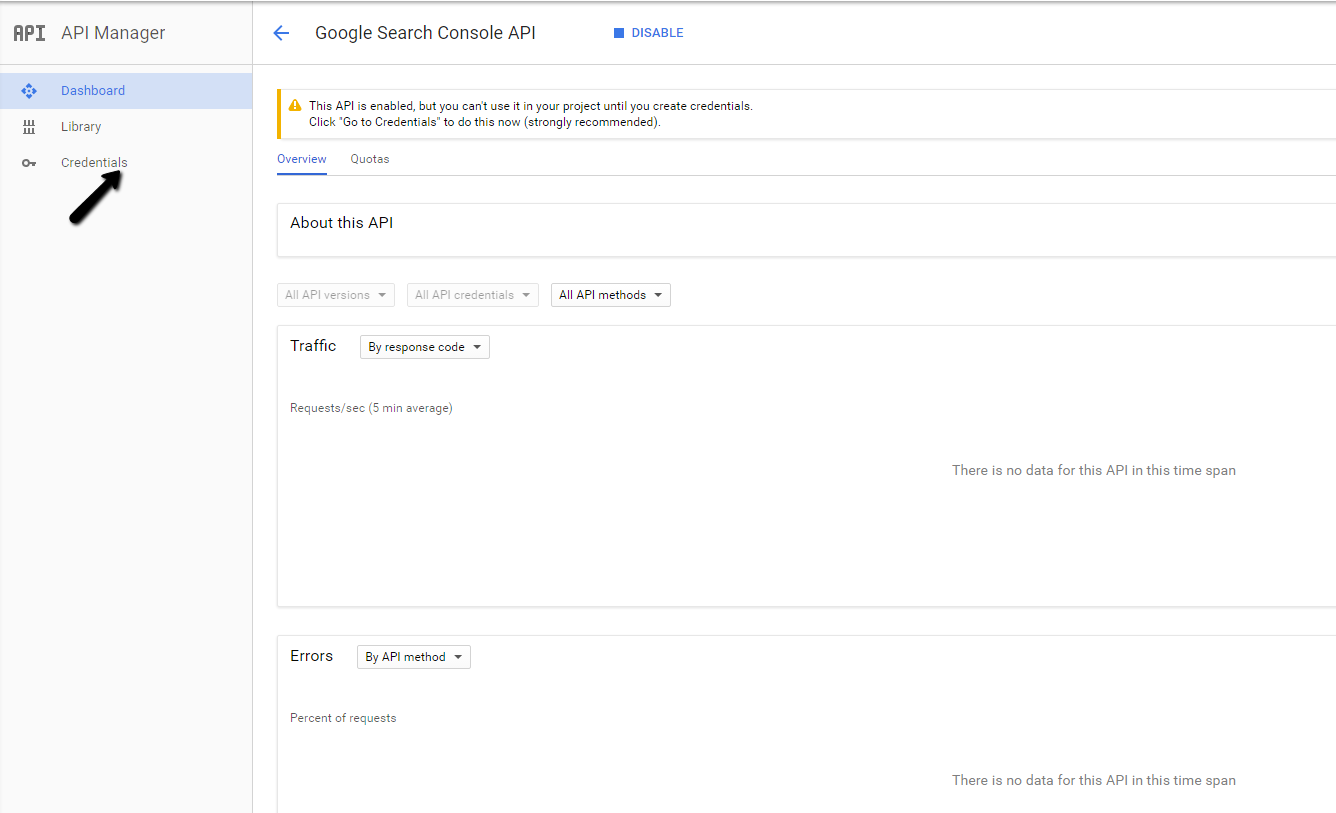
Step 12: Click Credentials on the left menu.
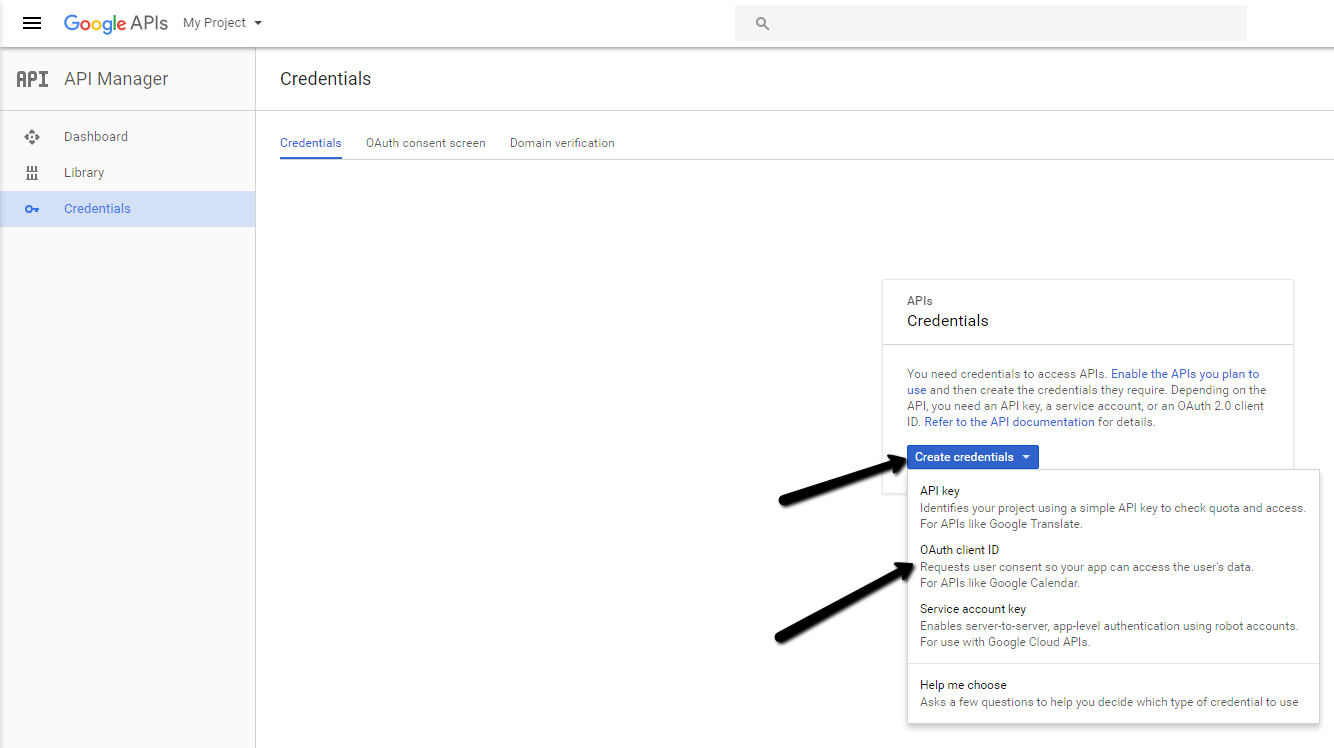
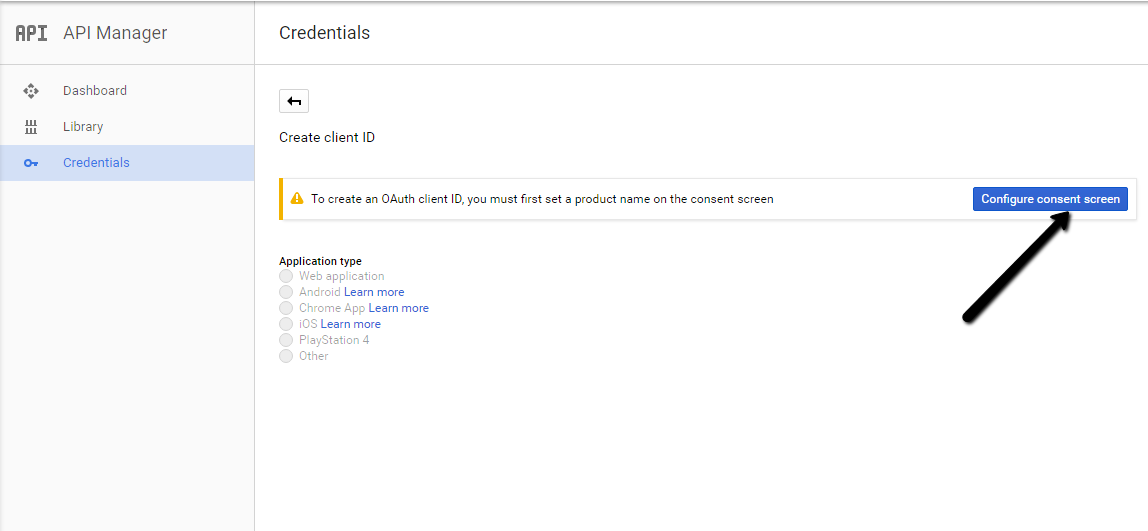
Step 13: Click Create credentials and, on the next screen, click OAuth client ID.
Step 14: Click Configure consent screen.
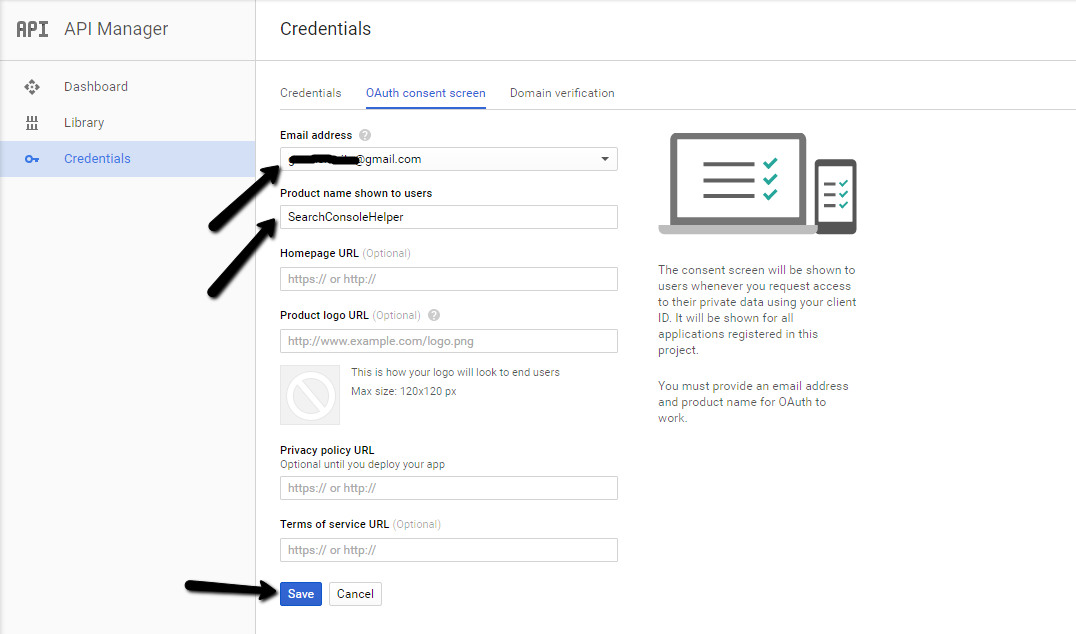
Step 15: Fill the form. Select your Google account email and type “SearchConsoleHelper” into the Product name shown to users field. Then click the Save button.
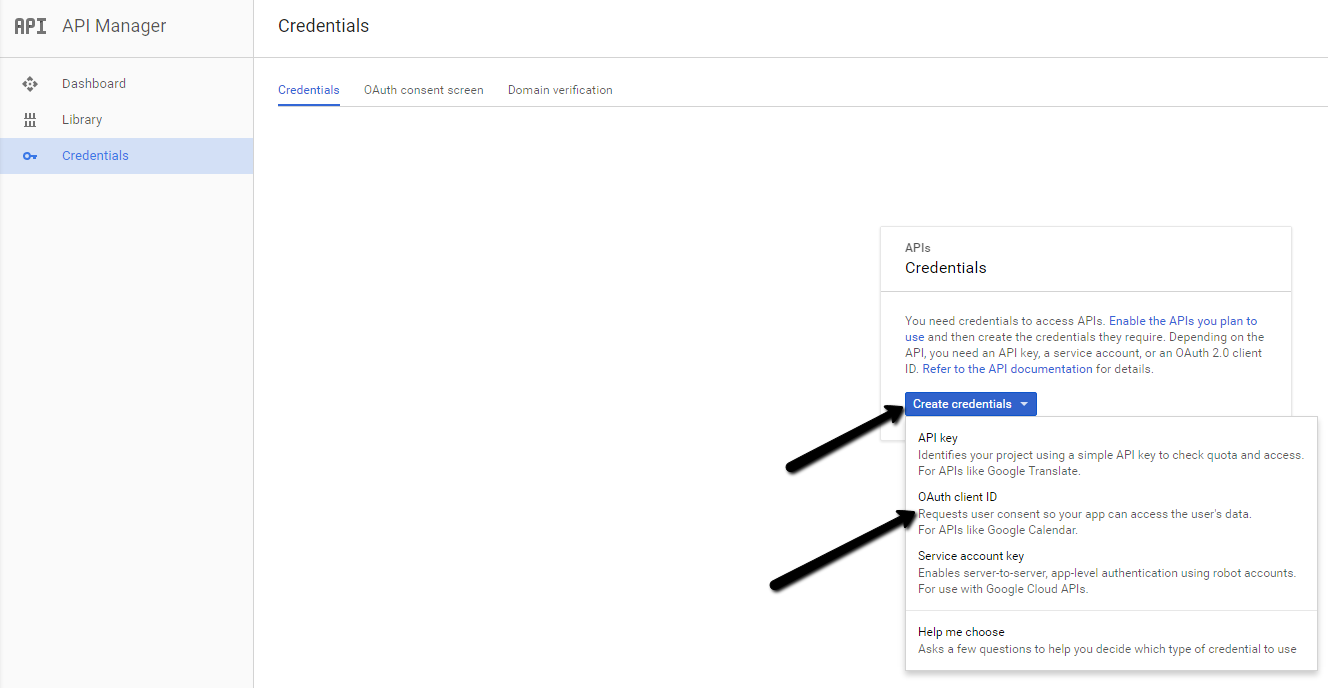
Step 16: Click Create credentials and then OAuth client ID.
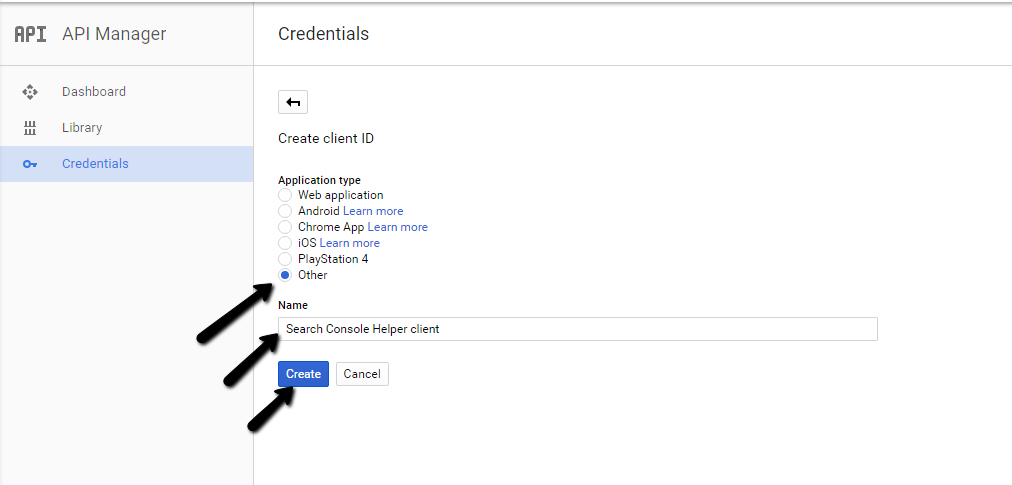
Step 17: Select Other for Application type, type “Search Console Helper client” under Name and click Create.
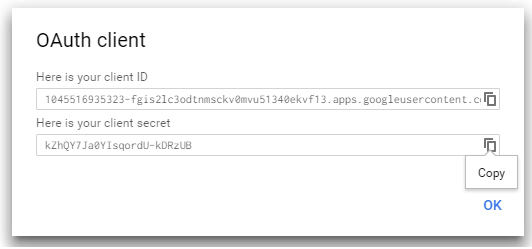
Step 18: You should now see your client ID and your client secret. With the small icon on the right side of the editor, you can easily copy these values to your file for future use.
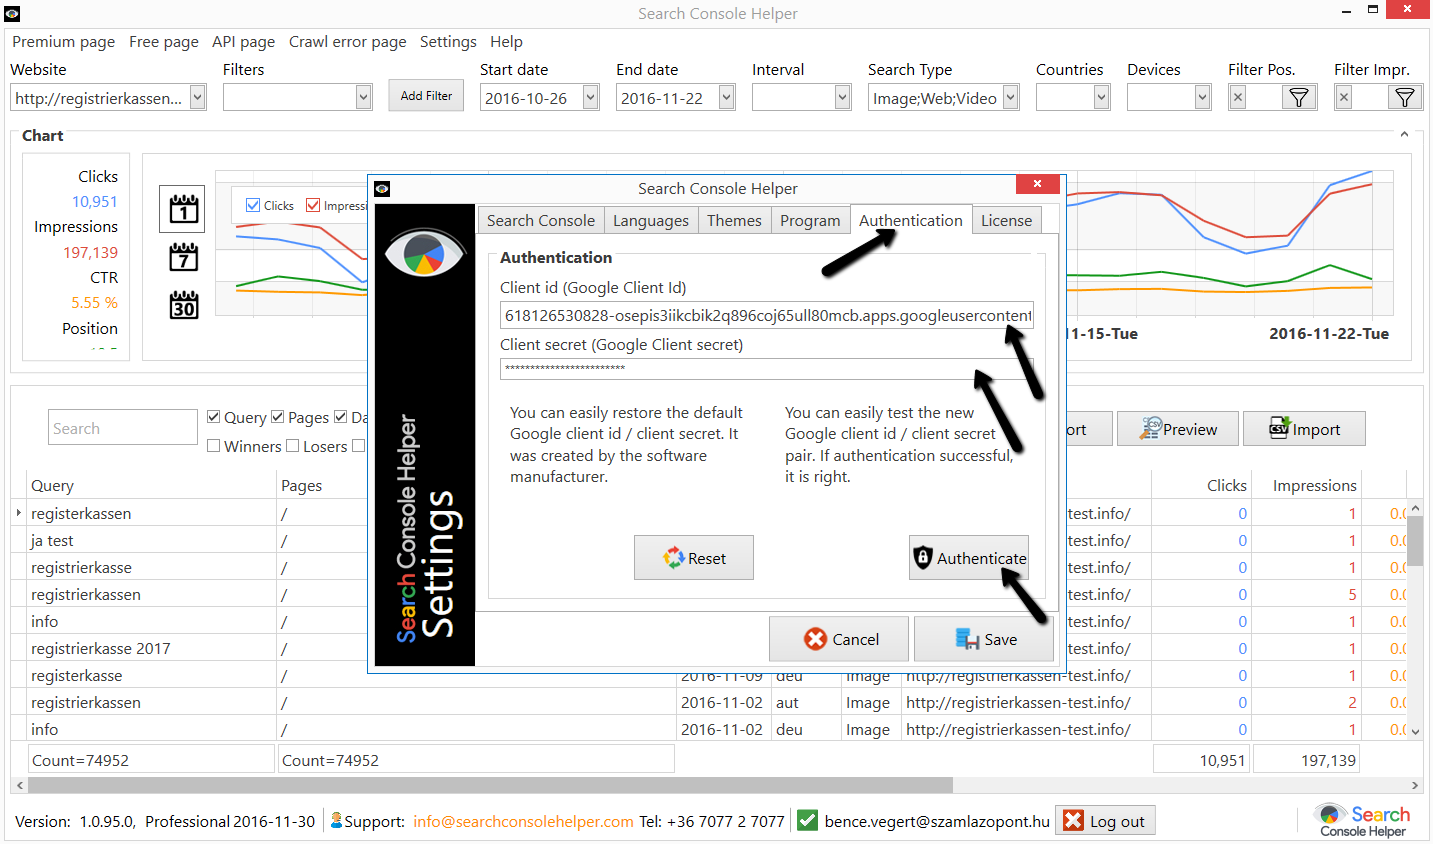
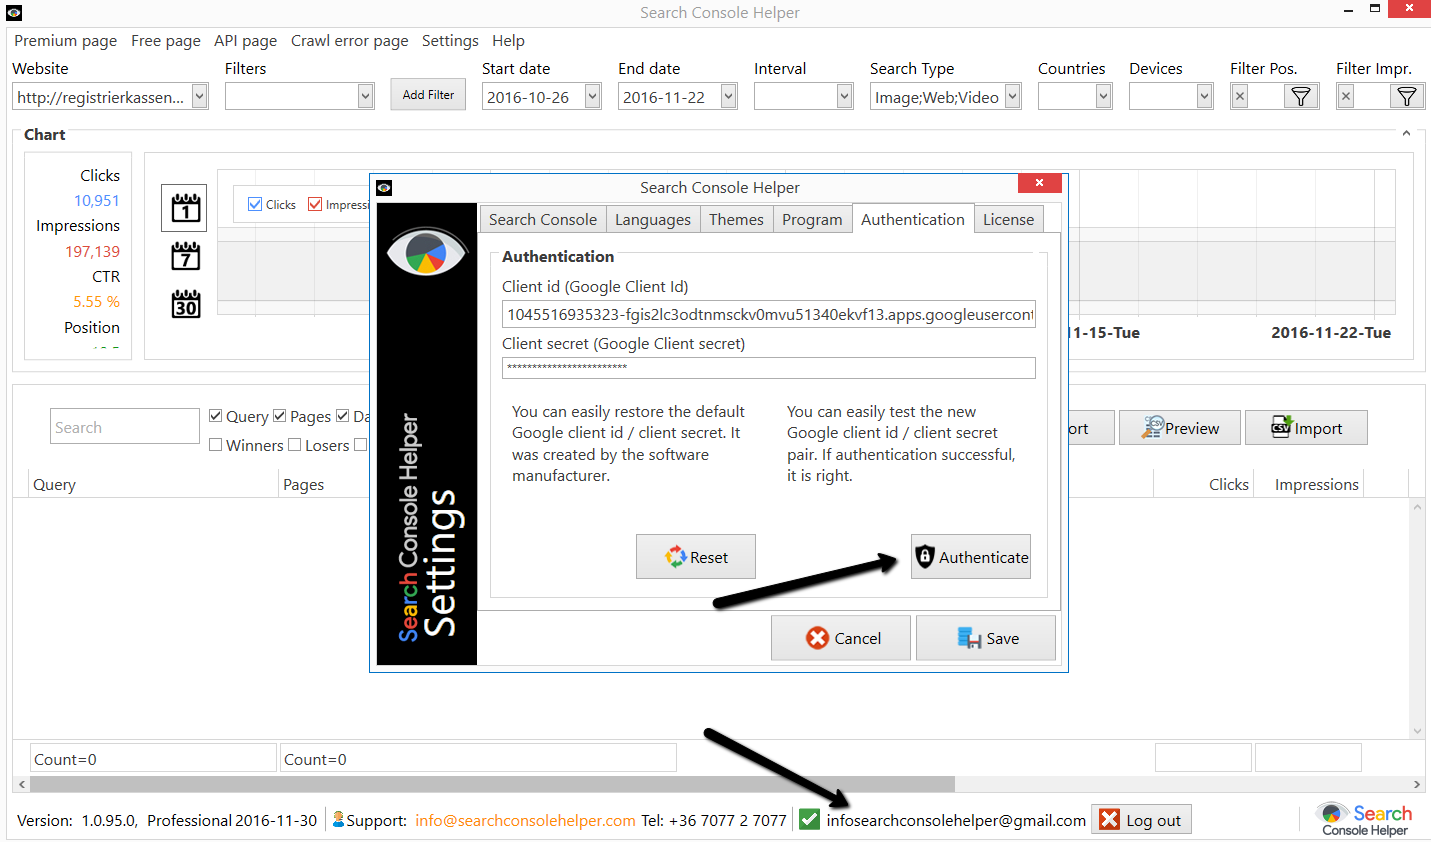
Step 19: Open the Search Console Helper application and go to Authenticaton tab on the Settings page. Copy-paste your client ID and your client secret (see previous step) to overwrite the existing values. Do not be confused by the stars in the client secret field, copy and paste your values, anyway.
Step 20: After you copy-pasted both values, click Authenticate. If the authentication was successful, click Save. You should now see your logged-in email account in the footer bar.
You have successfully created and set up your own API key! Congratulations!
If you have problem(s) during the process, feel free to contact us for support.
Resources
For more information about Google API, feel free to consult the following resources: